
A Telugu blog can become much more than a website because it can help you share knowledge, build an audience, and create future income opportunities online. The part that creates confusion for most people is not blogging itself, but understanding where to begin.
Today, more readers prefer consuming content in Telugu because information feels easier to understand and creates a stronger connection. This growing demand is creating opportunities across technology, education, blogging, finance, and several other categories.
That is why I am going to explain each step in a simple way, so you can understand how to choose the right niche, set up your website, create useful content, and build your Telugu blog with better confidence.
What You Need to Start a Blog in Telugu?
Many people think blogging starts with expensive tools, coding knowledge, or complicated technical setups. That usually creates unnecessary confusion because the reality is much simpler. You only need a few important things in the beginning, and after that, your main focus becomes creating useful content and growing your audience.
- A Clear Blogging Goal
Before setting up your blog, spend a few minutes understanding why you want to start it. A clear goal can make content planning and future decisions much easier.
Your goal could be:
- Building an online business
- Sharing knowledge
- Creating passive income
- Building a personal brand
- Growing a community
- Promoting your services
For example, a blog created for income may focus more on monetization methods such as affiliate marketing and ads, while an educational blog may focus more on useful and detailed information.
Without a clear direction, many beginners start writing random content and later become confused about what they should publish next.
- A Specific Niche and Audience
One mistake many beginners make is trying to write about everything. A blog that covers too many unrelated topics can become difficult for both readers and search engines to understand.
A focused niche usually creates better long term growth opportunities.
Popular Telugu blog niches include:
- Technology
- Education
- Food and recipes
- Travel
- Health
- Finance
- Jobs and careers
- Lifestyle
- Entertainment
- Local news
Choose a niche that matches:
- Your interest: Writing regularly becomes easier when you enjoy the topic.
- Your knowledge: Existing knowledge can help create more useful content.
- Audience demand: People should already be searching for information in that category.
- Long term potential: Your topic should provide enough content ideas for future growth.
For example:
If you enjoy technology, your content may include:
- Smartphone reviews
- AI tools
- Blogging tutorials
- Hosting guides
- Website tips
If you enjoy food content, you may write about:
- Telugu recipes
- Cooking tips
- Healthy meal ideas
- Traditional dishes
Choose something you can continue writing about even after your first 30–50 articles.
- Telugu Typing Tools
Creating Telugu content does not require expensive software or advanced technical tools. Several easy options already exist and can make writing more comfortable.
You can use:
- Google Input Tools
- Built in smartphone keyboards
- Voice typing
- Telugu keyboard applications
The easier your typing process becomes, the more comfortable regular content creation usually feels.
Examples:
- Type: namaskaram
- Output: నమస్కారం
- Type: blog ela start cheyali
- Output: బ్లాగ్ ఎలా స్టార్ట్ చేయాలి
Many bloggers also use voice typing because it can help create content faster.
4. Basic SEO Understanding
You do not need advanced SEO knowledge during the beginning stage. Learning a few basic concepts can create a strong foundation for future growth.
Focus on understanding:
- Keywords
- Headings
- Internal links
- Meta titles
- Meta descriptions
- Image optimization
- Search intent
For example:
- Weak title: Technology Tips
- Better title: 10 Technology Tips for Beginners in Telugu
A small change like this can help search engines and readers understand your content more clearly.
SEO becomes easier with practice, and you can always learn advanced techniques later as your blog grows.
How to Start a Blog in Telugu (Step By Step Guide)
Before moving ahead, it is important to understand what you will learn in the following steps. I will explain how to choose the right Telugu blog niche, register a domain name, set up hosting and WordPress, create useful content, improve SEO, attract visitors from Google, and build a blog that can grow into a valuable long term asset.
Step 1: Choose Your Telugu Blog Niche
Before buying a domain or setting up hosting, spend a few minutes thinking about one simple question:
What topic can you continue writing about even after your first 20 or 30 articles?
Many beginners start blogging with excitement, choose random topics, and later run out of ideas. That usually becomes one of the biggest reasons why blogs stop growing after a few months.
Your niche does much more than decide what you write. It can influence:
- The audience your blog attracts
- Future content ideas
- SEO opportunities
- Traffic potential
- Monetization methods
- Long term growth
Choosing the right niche at the beginning can save a lot of confusion later.
Choose a niche that matches these factors:
Your Interest
Writing regularly becomes easier when you enjoy the topic.
For example, if you enjoy technology, creating content about smartphones, AI tools, and blogging may feel natural.
If you choose a topic only because it looks profitable, writing consistently may become difficult after a few weeks.
Your Knowledge
You do not have to become an expert before starting, but having basic knowledge can help create more useful and practical content.
For example:
If you understand fitness, you may write:
- Home workout guides
- Weight loss tips
- Healthy diet plans
- Exercise routines
If you understand technology:
- App tutorials
- Hosting guides
- AI tools
- Smartphone comparisons
Audience Demand
People should already be searching for information in your selected category.
Creating content for topics nobody searches usually creates problems later because even good content requires readers.
You can check demand using:
- Google Autocomplete
- Google Trends
- People Also Ask
- Related Searches
Example:
Instead of choosing:
Mobile
Choose:
Best smartphones under ₹15,000 in Telugu
Specific topics often create better opportunities.
Long Term Potential
Choose a niche with enough content ideas for future growth.
Ask yourself: Can I write 50–100 articles on this topic?
If the answer is yes, the niche may have stronger long term potential.
Popular Telugu Blog Niches
- Technology
Topics may include:
- Smartphones
- Apps and software
- AI tools
- Hosting and blogging
- Gadget reviews
- Website tutorials
- Education
Topics may include:
- Exam preparation
- Study tips
- Career guidance
- Online courses
- Student resources
- Food and Recipes
Topics may include:
- Telugu recipes
- Healthy meals
- Traditional dishes
- Cooking tips
- Travel
Topics may include:
- Andhra Pradesh tourist places
- Telangana travel places
- Budget travel ideas
- Travel experiences
- Health
Topics may include:
- Fitness tips
- Home workouts
- Healthy diets
- Wellness information
- Finance
Topics may include:
- Saving tips
- Investment basics
- Online earning ideas
- Personal finance guides
- Jobs and Careers
Topics may include:
- Government jobs
- Interview preparation
- Career advice
- Skill development
One thing many beginners do is select a topic only because it appears popular. Trends can change quickly, but a topic you genuinely enjoy can continue giving you ideas for months or even years.
Writing regularly becomes much easier when you are interested in what you are creating.
Step 2: Choose a Domain Name for Your Telugu Blog
Before your blog goes live, one thing starts becoming your identity on the internet: your domain name. People will type it, remember it, share it with others, and slowly connect it with your content. A good domain name can stay with your website for years, which is why spending a few extra minutes here can save unnecessary changes later.
Since this guide uses YouStable WordPress Hosting, keeping your domain and hosting under one place can also make management easier. Instead of managing different dashboards, renewals, and settings from multiple platforms, you can control everything from a single account.
A good domain name should include:
- Short: Smaller names are easier to type and remember.
- Easy to remember: Visitors should recall your website without effort.
- Easy to type: Avoid names that create spelling confusion.
- Brandable: A unique name can help create a stronger website identity.
- Easy to pronounce: People should feel comfortable saying and sharing it.
Telugu Blog Domain Name Examples
Examples:
- TeluguTechGuide.com
- SmartTeluguHub.com
- TeluguCareerTips.com
- TeluguFoodStories.com
- TeluguTravelGuide.com
- LearnTeluguOnline.com
- TeluguBlogMaster.com
Domain availability changes regularly, so always search before registration because an available domain today may become unavailable later.
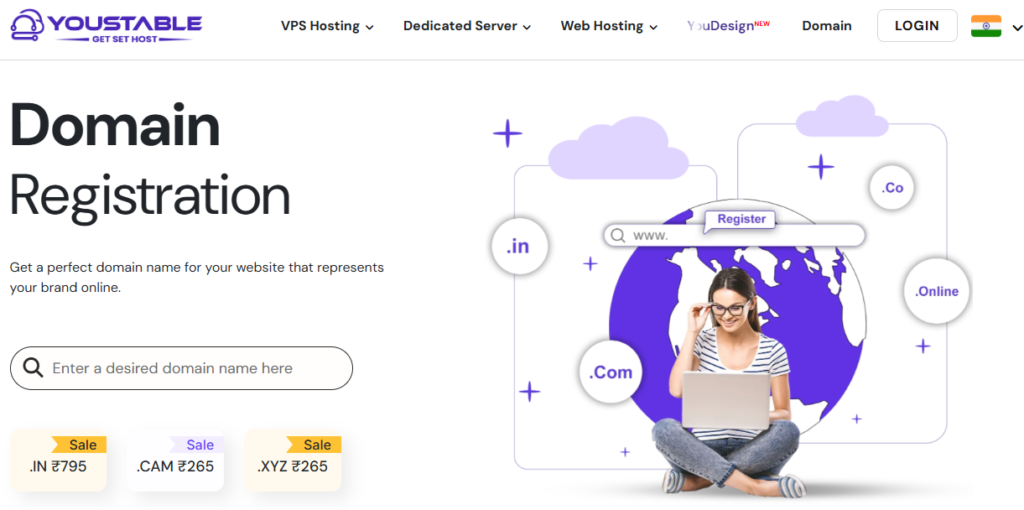
How To Register Your Domain From YouStable
After deciding your blog name, open the YouStable domain registration page and search for your preferred domain.
The process only takes a few steps:
Step 1: Enter Your Preferred Domain Name
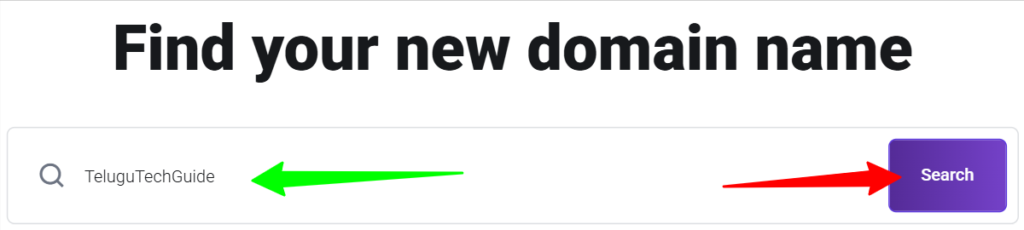
Type your desired website name inside the domain search box.
Example: TeluguTechGuide
or
SmartTeluguHub
Step 2: Check Available Domain Extensions
You will see multiple extension options, including:
- .com
- .in
- .online
- .net
- .org
For most blogs, .com usually works well because people easily recognize and remember it.
Step 3: Select Your Domain and Add It To Cart
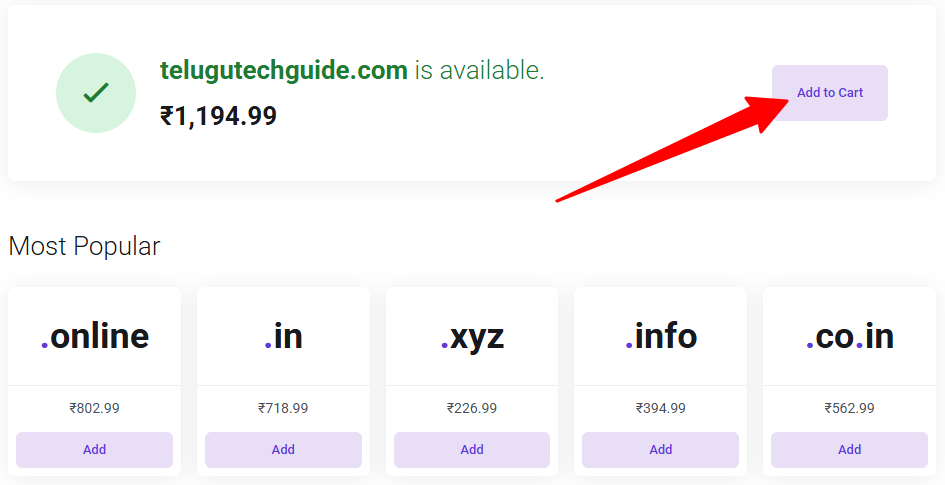
Choose the domain that matches your blog and click: Add to Cart
Step 4: Continue Registration Process
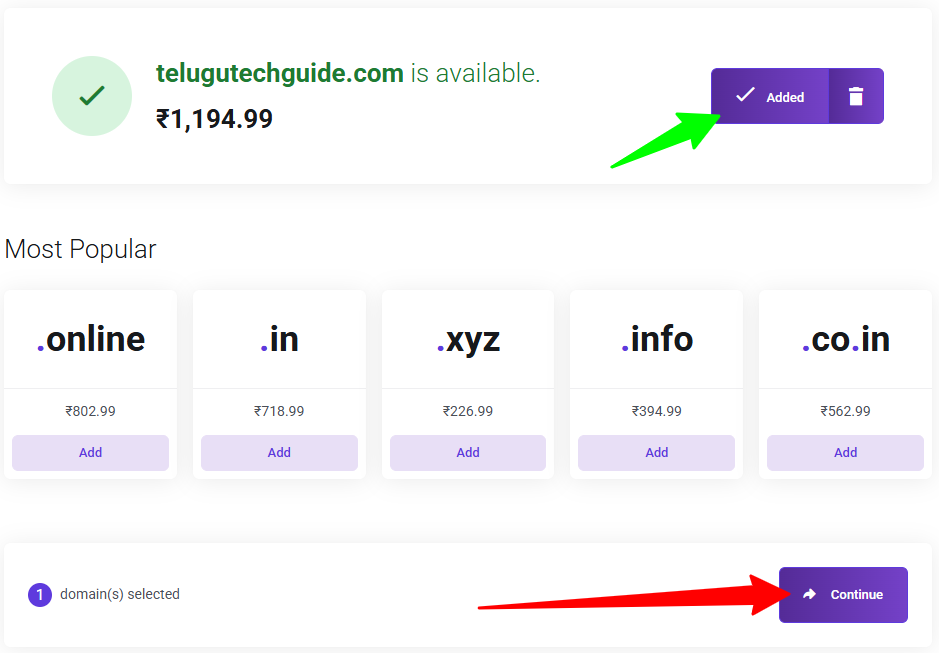
Complete the registration process and move to the next page.
YouStable may also show additional features during registration:
- Free Privacy Protection: Helps protect your personal registration details.
- DNS Management: Allows easier management of website connections and records.
- Domain Forwarding: Redirect visitors to another URL if needed.
- Domain Theft Protection: Adds protection against unauthorized transfers.
- Easy to Use Control Panel: Manage settings from one dashboard.
Common Domain Mistakes To Avoid
Many beginners make small mistakes while selecting a domain name. These mistakes may create problems later.
Avoid these:
Adding Numbers
Bad example: TeluguTech123Guide.com
Numbers can create confusion when people type your website address.
Using Very Long Names
Bad example: BestTechnologyBlogForTeluguPeopleOnline.com
Long names often become difficult to remember.
Using Difficult Spellings
Bad example: TelughuTekknolajiGuide.com
Complicated spellings can send visitors to the wrong website.
Using Too Many Symbols
Bad example: Telugu-Tech-Blog-Guide-2026.com
Too many extra characters can make a domain look less clean.
One thing creates confusion for many beginners. People often try adding too many keywords inside their domain because they believe rankings automatically improve.
Search engines care much more about:
- Useful content
- User experience
- Website quality
- Relevance
A clean and simple domain often creates a stronger impression than a long domain filled with unnecessary words.
Step 3: Set Up WordPress Hosting With YouStable
After choosing your domain name, the next step is setting up hosting for your blog. Hosting stores your articles, images, pages, and website files so visitors can access your website online.
Think of it like this:
- Domain = Your website address
- Hosting = Your website’s home
For example:
If your domain is:
TeluguTechGuide.com
Hosting stores everything related to that website, including:
- Articles
- Images
- Themes
- Plugins
- Databases
- Website settings
Without hosting, your website cannot become accessible on the internet.
For a Telugu blog, Indian WordPress Hosting can be a practical option because it is designed specifically for content websites and bloggers.
Current YouStable WordPress Hosting Benefits
Some available benefits include:
- Up to 80% OFF on selected plans
- Free domain for eligible plans
- Free website migration
- 30 Day Money Back Guarantee
- LiteSpeed + LS Cache technology
- Imunify360 website security
- Automatic updates
- Free Off Site Backup
These features can become useful because beginners usually prefer a setup that requires less technical work.
Choose Your WordPress Hosting Plan
Select a plan according to your website requirements.
If this is your first Telugu blog, the beginner plan can usually work well because new websites generally do not require larger resources in the beginning.
You can always upgrade later if your website traffic grows.
Continue With Your Hosting Setup
Select Your Hosting Plan
Open the WordPress Hosting section and click:
Get Started: below your preferred plan.
Add Your Domain
Now you will see different options:
Register a New Domain: Choose this option if you are creating a new website.
Use Existing Domain: Choose this if you already purchased a domain earlier.
Transfer Your Domain: Choose this option if you want to move your domain from another provider.
If your hosting plan includes a free domain offer, it may automatically appear during setup.
Choose Hosting Duration
Select your preferred duration:
- 1 Month
- 1 Year
- 3 Years
Longer plans sometimes include additional savings and discounts.
Create Your Account
Enter the required information:
- Name
- Email Address
- Phone Number
- Password
Make sure your email address is active because important notifications may arrive there later.
Examples include:
- Login details
- Billing information
- Security notifications
- Website updates
Complete Payment
Choose your preferred payment method and complete your order.
Payment options may vary and can include:
- UPI
- Debit Card
- Credit Card
- Net Banking
- Wallets
After successful payment, your hosting account becomes active.
Install WordPress
Most WordPress hosting plans include a One Click WordPress Installer, which removes complicated manual setup steps.
Open:
One Click WordPress Installer
Enter:
Website Name
Example:
Telugu Tech Guide
Username
Example:
teluguadmin
Avoid:
- admin
- administrator
Password
Create a strong password using:
- Uppercase letters
- Lowercase letters
- Numbers
- Special characters
Example:
Telugu@Blog2026
Email Address
Enter an active email.
After entering everything, click: Install WordPress
The installation process usually takes only a few moments.
After installation, open your dashboard: yourdomain.com/wp-admin
Example: telugutechguide.com/wp-admin
Your hosting and WordPress setup is now complete. The next step becomes customizing your website and preparing it for your first Telugu blog post.
Step 4: Install WordPress
Your hosting setup is now complete, so the next step is installing WordPress. This is the software that allows you to create articles, upload images, customize your design, and manage your complete website from one dashboard.
Most WordPress hosting plans, including YouStable WordPress Hosting, include a One Click WordPress Installer, so you do not need to upload files manually or deal with complicated technical steps.
The installation process usually takes only a few minutes.
Open WordPress Installer
Log in to your YouStable Hosting Dashboard and locate:
One Click WordPress Installer
Click and open it.
After opening the installer, you will see a setup form asking for a few website details.
Enter Website Information
Fill in the required details carefully because these settings become part of your website configuration.
Website Name
This is your website name that visitors will see.
Examples:
- Telugu Tech Hub
- Smart Telugu Guide
- Telugu Career Tips
- Telugu Food Stories
- Telugu Blogging Academy
Choose a name that matches your niche and website purpose.
Username
Create your WordPress admin username.
Examples:
- teluguadmin
- smartteluguadmin
- blogadmintelugu
Avoid using common usernames like:
- admin
- administrator
Many beginners use simple usernames, which can create unnecessary security risks.
Unique usernames generally provide better protection.
Password
Create a strong password for your WordPress login.
A stronger password usually includes:
- Uppercase letters
- Lowercase letters
- Numbers
- Special characters
Example format: Telugu@Blog2026
Avoid weak passwords like:
- 123456
- password123
- admin123
Weak passwords can create security issues later.
Email Address
Enter an active email address because WordPress uses this for important notifications.
Examples include:
- Password reset requests
- Plugin updates
- Website notifications
- Security alerts
- Admin messages
Always use an email that you regularly access.
Complete WordPress Installation
After entering all required information, click:
Install WordPress
The setup process usually takes only a few moments.
During installation, WordPress automatically creates:
- Website database
- Dashboard files
- Default settings
- Login information
- Website structure
After setup finishes, your website becomes ready.
Open Your WordPress Dashboard
You can access your dashboard using: yourdomain.com/wp-admin
Example: telugutechguide.com/wp-admin
Enter:
Username
Password
After login, you will enter the WordPress Admin Dashboard, where you can manage your complete website.
Configure Basic WordPress Settings
Before writing your first article, change a few basic settings so your blog starts with a cleaner structure.
Site Title
Open: Settings → General
Enter a website title related to your niche.
Examples:
- Telugu Tech Hub
- Telugu Career Guide
- Telugu Food Stories
A clear title helps visitors quickly understand your website topic.
Time Zone
Inside: Settings → General
Locate: Time Zone
Select your local time zone correctly.
Example:
Kolkata (UTC +5:30)
This helps display the correct:
- Post publishing time
- Scheduled article time
- Website notifications
Permalink Structure
Open: Settings → Permalinks
Select: Post Name
Example:
Good: yourdomain.com/best-smartphones
Avoid: yourdomain.com/p=123
Clean URLs become easier to read, share, and understand.
Remove Default Content
After installation, WordPress usually adds some default content automatically.
Delete:
- Sample post
- Sample page
- Default comments
Removing unnecessary content keeps your website cleaner.
Install Basic Plugins
A few plugins can help improve website management from the beginning.
| Plugin Type | Recommended Plugin | Purpose |
| SEO | Rank Math | Helps optimize content |
| Cache | LiteSpeed Cache | Improves website speed |
| Security | Wordfence | Adds website protection |
| Backup | UpdraftPlus | Creates backups |
| Contact Form | WPForms | Creates contact forms |
After completing these settings, your WordPress dashboard becomes ready, and the next step becomes selecting your website design.
Step 5: Choose a Lightweight WordPress Theme
Your WordPress installation is now ready, so the next step is selecting a theme for your website. A theme controls how your blog looks, including layout, colors, homepage design, menus, article pages, typography, and overall user experience.
Many beginners choose themes only because they look attractive, but selecting a heavy theme with too many animations and unnecessary features can slow down your website.
For a blogging website, speed, simplicity, and user experience usually create better long term results.
Think of your theme like the design of a shop. Even if your products are excellent, visitors may leave quickly if the store looks confusing or takes too long to load.
What To Check Before Selecting a Theme
Before installing a theme, check these important factors:
Mobile Responsive Design
Most internet users now browse websites from smartphones.
Your website should automatically adjust on:
- Mobile phones
- Tablets
- Laptops
- Desktop screens
If visitors need to zoom or scroll excessively, user experience can become poor.
Fast Loading Performance
Website speed matters for both visitors and search engines.
A lightweight theme can help:
- Open pages faster
- Improve user experience
- Reduce bounce rate
- Improve Core Web Vitals
Visitors generally do not wait long for slow pages.
SEO Friendly Structure
A cleaner code structure can help search engines understand your content more effectively.
SEO friendly themes often provide:
- Better heading structure
- Faster indexing
- Cleaner code
- Improved crawling
Regular Updates
Theme developers regularly release updates.
Updates usually include:
- Security improvements
- Performance fixes
- Bug fixes
- Compatibility improvements
Avoid themes that have not received updates for long periods.
Easy Customization
You should be able to change website settings easily without coding knowledge.
Useful customization options include:
- Logo upload
- Colors
- Fonts
- Header settings
- Footer settings
- Layout options
Beginner Friendly WordPress Themes
These themes are commonly used by bloggers because they are lightweight and easy to customize.
| Theme | Best For | Main Features |
| Astra | Blogs and beginners | Lightweight design, fast loading, easy customization |
| GeneratePress | Content websites | Speed focused, clean structure |
| Kadence | Growing blogs | Drag-and-drop customization |
| Blocksy | Modern websites | Flexible design and faster performance |
For beginners, Astra and GeneratePress usually work well because they are simple and optimized for performance.
How To Install a WordPress Theme
Open your WordPress dashboard and follow these steps:
Appearance → Themes → Add New
Now search for your preferred theme.
Examples:
- Astra
- GeneratePress
- Kadence
- Blocksy
After finding the theme:
Step 1: Click Install
Step 2: Click Activate
Your theme will now become active.
Customize Your Theme
After activation, open:
Appearance → Customize
You can now customize:
Website Logo
Upload your website logo.
Colors
Select colors that match your website style.
Fonts
Choose readable fonts.
Avoid very decorative fonts because they can reduce readability.
Header Layout
Customize:
- Navigation menu
- Logo placement
- Search option
Menu Structure
Create menu sections such as:
- Home
- About Us
- Contact
- Categories
- Blog
Beginner Tip
Many beginners continuously change themes after launching their websites.
This often creates:
- Design inconsistency
- Plugin conflicts
- Layout issues
- SEO problems
Choose a clean theme in the beginning and avoid changing it frequently.
For a new Telugu blog, themes like Astra or GeneratePress can work well because they provide faster performance and easier setup without creating unnecessary complexity.
Step 6: Create Essential Pages
Your blog setup is now almost ready, but before publishing articles, you should create a few important pages. Many beginners skip this step because they think these pages are unnecessary in the beginning.
However, these pages help visitors understand your website and can also improve trust. Search engines and advertising platforms may also expect certain pages before approving services such as Google AdSense.
A blog without these pages can sometimes look incomplete.
Some pages help explain:
- Who you are
- What your website provides
- How users can contact you
- How information is collected
- Website terms and limitations
Let’s create the important pages one by one.
About Us Page
The About Us page introduces your website and tells visitors why they should trust your content.
You do not need to write your full life story here.
Focus on explaining:
- Who you are
- What your website covers
- Why visitors should read your content
- Your website mission
Example structure:
Welcome to Telugu Tech Hub. This website shares useful content related to technology, blogging, AI tools, and online learning in Telugu. Our goal is to make information easier to understand through simple and practical guides.
A clear About page can help visitors feel more connected with your website.
Contact Page
Visitors may want to contact you for different reasons.
Examples:
- Questions
- Suggestions
- Business inquiries
- Collaborations
- Feedback
Create a Contact page that allows users to reach you easily.
You can include:
- Contact form
- Email address
- Social media links
Many bloggers use WPForms because it creates forms without coding.
Example:
Name
Email Address
Message
Simple contact forms usually work well.
Privacy Policy Page
This page explains how information may be collected and used on your website.
Examples may include:
- Cookies
- Analytics data
- Email subscriptions
- Advertising services
Many services such as:
- Google AdSense
- Google Analytics
- Affiliate programs
may require a Privacy Policy page.
You can create it automatically:
Open: Settings → Privacy
WordPress also provides a basic privacy template that you can edit.
Disclaimer Page
A Disclaimer page explains limitations related to your website content.
For example:
If your website provides:
- Health information
- Finance content
- Educational advice
- Affiliate recommendations
You should explain that information is shared for educational purposes and users should make their own decisions.
Example:
The information available on this website is provided for educational and informational purposes only.
This can help create transparency.
Terms and Conditions Page
Terms and Conditions define rules for using your website.
Examples:
- User responsibilities
- Content usage rules
- Copyright information
- Website limitations
Although many beginners ignore this page, it can become useful as your website grows.
How To Create Pages In WordPress
Open your WordPress dashboard: Pages → Add New
Now create pages one by one:
- About Us
- Contact
- Privacy Policy
- Disclaimer
- Terms and Conditions
After creating them:
Click: Publish
Add Pages To Your Website Menu
After creating pages, add them to your navigation menu so visitors can access them easily.
Open: Appearance → Menus
Click: Create New Menu
Add:
- Home
- About Us
- Contact
- Privacy Policy
- Disclaimer
Then click: Save Menu
These pages create a stronger foundation and help your Telugu blog look more professional from the beginning.
Step 7: Install Essential Plugins
Your WordPress blog is now ready, but a fresh WordPress installation does not include every feature by default. Plugins help add additional functionality such as SEO improvements, website security, backups, speed optimization, and contact forms.
Many beginners make one common mistake here. They install too many plugins immediately after creating their website because they think more plugins automatically make a website better.
The reality is different.
Installing unnecessary plugins can sometimes:
- Slow down your website
- Increase resource usage
- Create compatibility issues
- Increase security risks
- Make management difficult
Start with important plugins first and install additional tools only when they become necessary.
Recommended Plugins for a New Telugu Blog
Below are some commonly used plugins that can help manage your website more efficiently.
| Plugin Category | Recommended Options | Purpose |
| SEO Plugin | Rank Math, Yoast SEO | Helps optimize articles and search visibility |
| Cache Plugin | LiteSpeed Cache | Improves website speed |
| Security Plugin | Wordfence | Adds website protection |
| Backup Plugin | UpdraftPlus | Creates website backups |
| Image Optimization Plugin | ShortPixel, Imagify | Reduces image size |
| Contact Form Plugin | WPForms | Creates forms for visitors |
Let’s understand them one by one.
SEO Plugin
SEO plugins help optimize your content so search engines can understand your pages better.
Popular options:
- Rank Math
- Yoast SEO
These plugins can help with:
- Meta titles
- Meta descriptions
- XML sitemaps
- Keyword optimization
- Schema settings
- Content analysis
For beginners, Rank Math is commonly preferred because it provides multiple features inside one plugin.
Cache Plugin
Website speed matters for both users and search engines.
Cache plugins help:
- Reduce loading time
- Improve performance
- Improve user experience
- Support Core Web Vitals
Recommended plugin: LiteSpeed Cache
This plugin can help with:
- Page caching
- CSS optimization
- JavaScript optimization
- Image optimization
Fast loading websites usually create better user experience.
Security Plugin
Website security becomes important because websites can receive spam attempts and unwanted traffic.
Recommended plugin: Wordfence
Security plugins can help:
- Block suspicious activity
- Add firewall protection
- Detect malware
- Monitor login attempts
Even a small blog should have basic security enabled.
Backup Plugin
Imagine publishing 50 articles and suddenly facing a technical problem.
Without backups, recovering content can become difficult.
Recommended plugin: UpdraftPlus
It can help:
- Create automatic backups
- Restore websites quickly
- Store backups safely
Backup copies act like an extra safety layer.
Image Optimization Plugin
Large images can slow your website.
Image optimization plugins reduce image size while maintaining quality.
Recommended options:
- ShortPixel
- Imagify
Benefits:
- Faster page loading
- Better performance
- Reduced storage usage
Contact Form Plugin
Visitors may want to contact you for:
- Questions
- Suggestions
- Business inquiries
- Collaborations
Recommended plugin: WPForms
WPForms helps create forms without coding.
Example fields:
- Name
- Email Address
- Message
How To Install Plugins
Open your WordPress dashboard and follow these steps: Plugins → Add New
Search for your plugin.
Examples:
- Rank Math
- LiteSpeed Cache
- Wordfence
- UpdraftPlus
- WPForms
Now:
Step 1: Click Install Now
Step 2: Click Activate
The plugin will now become active.
Plugins You Can Start With First
If this is your first Telugu blog, these plugins are usually enough in the beginning:
Rank Math → Helps with SEO settings and content optimization
LiteSpeed Cache → Helps improve website speed
Wordfence → Adds security protection
UpdraftPlus → Creates backups
WPForms → Creates contact forms
Start with only important plugins because adding too many plugins together can affect performance and create unnecessary complexity.
Step 8: Set Up Telugu Typing
Your blog setup is almost ready. Now you need a simple and comfortable way to write content in Telugu. Many beginners think they need special software or advanced tools for regional language typing, but that is not necessary.
Several easy options already exist, and you can choose the method that feels comfortable for you.
Remember one thing:
Your goal is not finding the perfect typing tool. Your goal is creating content consistently.
The easier your writing process becomes, the easier it usually becomes to publish articles regularly.
Popular Telugu Typing Methods
| Typing Method | How It Works | Best For |
| Google Input Tools | Type English words and convert them into Telugu | Beginners |
| Voice Typing | Speak and convert speech into text | Faster content writing |
| Smartphone Keyboard | Built in Telugu keyboard on phones | Mobile users |
| Telugu Keyboard Apps | Dedicated Telugu typing applications | Regular Telugu writers |
Let’s understand these methods.
Google Input Tools
Google Input Tools is one of the easiest options for beginners.
You simply type Telugu words using English letters, and the tool converts them automatically.
Examples:
Type:
namaskaram
- Output: నమస్కారం
- Type: blog ela start cheyali
- Output: బ్లాగ్ ఎలా స్టార్ట్ చేయాలి
- Type: telugu blogging guide
- Output: తెలుగు బ్లాగింగ్ గైడ్
This method usually feels easier because you do not need to memorize Telugu keyboard layouts.
Best for:
- Beginners
- Bloggers new to Telugu typing
- Faster content creation
Voice Typing
Voice typing can help create content quickly.
Instead of typing manually, you simply speak naturally into your microphone.
Many devices now support voice typing through:
- Google Keyboard (Gboard)
- Google Docs Voice Typing
- Mobile voice input tools
Example:
Speak: “How to start a Telugu blog”
Output: తెలుగు బ్లాగ్ ఎలా ప్రారంభించాలి
After conversion, you can review and correct small mistakes if necessary.
Voice typing can become useful for:
- Long articles
- Faster writing
- People who prefer speaking over typing
Smartphone Keyboard
Most smartphones already include Telugu keyboards.
To enable Telugu keyboard:
Android
Open: Settings → System → Languages & Input → Keyboard → Add Language
Choose: Telugu
iPhone
Open: Settings → General → Keyboard → Add New Keyboard
Select: Telugu
After activation, you can switch between languages while typing.
This option works well for:
- Mobile users
- Quick editing
- Publishing articles on smartphones
Telugu Keyboard Applications
Some bloggers prefer dedicated Telugu typing apps because they provide additional features.
Examples include:
- Gboard
- SwiftKey
- Telugu Keyboard Apps
Features may include:
- Word suggestions
- Voice typing
- Transliteration support
- Auto correction
Choose the option that feels natural because comfort matters more than using complicated tools.
Beginner Tip
Many successful bloggers start using simple transliteration tools first and later move to faster methods.
Do not spend too much time searching for the perfect typing setup.
Focus more on:
- Writing useful content
- Publishing regularly
- Improving over time
The typing method can always change later as your workflow becomes more comfortable.
Step 9: Publish Your First Telugu Blog Post
Your blog setup is now ready, so the next step is publishing your first article. Many beginners spend too much time trying to make their first post perfect. That usually creates unnecessary delays.
Remember one thing:
Your first article does not need to be perfect. It simply needs to be useful.
Most successful blogs improve over time through updates, better writing, and regular publishing.
Focus on creating content that answers reader questions clearly and provides real value.
Before Publishing Your First Article
Before clicking the publish button, make sure your article includes these important elements.
Clear Title
Your title should immediately tell readers what the article is about.
Weak example: Technology Tips
Better example: 10 Best Smartphones Under ₹20,000 in Telugu
Another example: How To Start Blogging in Telugu for Beginners
Clear titles usually improve:
- Click through rate
- User understanding
- Search visibility
Use Proper Headings
Headings help organize content and improve readability.
Structure your article like this:
H1: Main title
Example:
How To Start Blogging in Telugu
H2: Main sections
Examples:
- Benefits of Blogging
- Best Platforms
- SEO Tips
H3: Sub sections
Examples:
- Keyword Research
- Content Writing Tips
A structured article becomes easier for readers and search engines to understand.
Add Helpful Information
Avoid adding unnecessary filler content.
Focus on answering user questions directly.
Include:
- Clear explanations
- Real examples
- Step-by-step guidance
- Useful tips
- Screenshots where necessary
Weak example: Smartphones are useful devices.
Better example: This smartphone includes a 5000mAh battery, a 50MP camera, and performs well for gaming and daily use.
Specific information usually creates stronger content.
Include Relevant Images
Images can make articles more engaging.
You can include:
- Screenshots
- Infographics
- Charts
- Tutorial images
Images can help readers understand information more easily.
Before uploading images:
- Compress image size
- Resize large images
- Add descriptive file names
- Add image alt text
Example:
Alt text: Telugu blogging dashboard setup
Add Internal Links
Internal links connect related pages on your website.
Example:
If your article is:
How To Start Blogging in Telugu
Connect it with:
- Best Hosting Guide
- SEO Guide
- Keyword Research Tutorial
- Blogging Mistakes Guide
Benefits:
- Better navigation
- Increased page views
- Better crawling
- Improved user experience
Optimize for Mobile Users
Many visitors now read articles from smartphones.
Before publishing, check:
- Text readability
- Image size
- Spacing
- Button visibility
- Overall layout
You can preview your article in:
WordPress → Preview → Mobile View
Publish Your Article
Open your WordPress dashboard:
Posts → Add New
Now enter:
- Title
- Content
- Images
- Categories
- Featured Image
Review everything carefully.
After reviewing, click:
Publish
Your first article is now live.
Do not worry if your first article feels simple. Almost every successful blogger improves gradually over time.
The most important step is starting and publishing consistently.
Step 10: Submit Your Blog to Google Search Console
After publishing your first article, the next important step is connecting your website with Google Search Console.
Many beginners publish articles and simply wait for traffic to appear automatically. The problem is that search engines may take longer to discover new pages if your website is not connected properly.
Google Search Console helps Google understand your website and provides useful performance data.
It can help you:
- Monitor indexed pages
- Track website traffic
- View search impressions
- Find ranking keywords
- Detect errors
- Monitor website performance
Think of it as a control dashboard for your website inside Google.
Set Up Google Search Console
Follow these steps:
Step 1: Open Google Search Console
Open Google Search Console and sign in using your Google account.
You will now see your dashboard.
Click: Start Now
Step 2: Add Your Website Property
Now click: Add Property
You will see two options:
Domain Property
Tracks your entire website.
Example: yourdomain.com
This option includes:
- www version
- non-www version
- HTTP version
- HTTPS version
- Subdomains
For most websites, this option usually works better.
URL Prefix Property
Tracks only a specific URL version.
Example: https://yourdomain.com
Step 3: Enter Your Website Domain
Example: telugutechguide.com
Click: Continue
Step 4: Verify Domain Ownership
Google now needs confirmation that you own the website.
Common verification methods include:
- DNS record verification
- HTML file upload
- HTML tag
- Google Analytics
- Google Tag Manager
For domain verification, DNS method is commonly used.
Steps: Open your hosting dashboard.
Go to: DNS Management
Copy the TXT record provided by Google.
Paste it into your domain DNS settings.
Click: Save
Return to Google Search Console and click:
Verify: Verification may sometimes take a few minutes.
Step 5: Submit Your XML Sitemap
A sitemap helps Google understand which pages exist on your website.
Most SEO plugins such as Rank Math automatically generate a sitemap.
Open: yourdomain.com/sitemap.xml
Example: telugutechguide.com/sitemap.xml
Copy this URL.
Now open: Google Search Console → Sitemaps
Paste your sitemap URL.
Click: Submit
Google can now discover pages more efficiently.
Step 6: Request Indexing For Important Pages
After publishing your first article, you can manually request indexing.
Open: URL Inspection Tool
Paste your article URL.
Example: https://telugutechguide.com/how-to-start-blogging
Click: Request Indexing
Google will now review your page for indexing.
What You Can Monitor Inside Search Console
After setup, you can track important data such as:
- Indexed pages
- Search impressions
- Clicks
- Ranking keywords
- Website performance
- Coverage issues
- Mobile usability
- Top performing pages
For example:
You may later discover:
- Which articles receive the most traffic
- Which keywords users search for
- Which pages require improvement
This information becomes extremely useful because it helps improve your content strategy over time.
Your Telugu blog is now connected with Google and ready for search visibility.
Best Platform To Start a Telugu Blog
Before moving ahead, spend a minute thinking about the platform you want to build your blog on. Many beginners start with free platforms because they look easier in the beginning, but later switch after facing limitations in SEO, customization, and monetization.
The platform you choose today can affect how easily your website grows in the future.
Some platforms give complete control, while others may restrict customization and growth opportunities.
Popular Platforms for Telugu Blogging
| Platform | Best For | Benefits | Limitations |
| WordPress | Long term blogging websites | Full ownership, better SEO control, thousands of themes and plugins, flexible monetization | Requires domain and hosting |
| Blogger | Beginners and simple blogs | Free setup, easy to use, no hosting cost | Limited customization |
| Medium | Simple content publishing | Easy publishing with built in audience | Limited website control |
| Wix | Beginners and portfolio websites | Drag and drop setup | Less flexibility compared to WordPress |
Let’s understand these options more clearly.
WordPress
WordPress is one of the most widely used blogging platforms because it provides complete ownership and flexibility.
Benefits include:
- Better SEO control
- Thousands of plugins
- Thousands of themes
- Complete website ownership
- Multiple monetization options
- Better customization options
For example, if you later want to add:
- Affiliate marketing tools
- Membership sections
- Online courses
- E-commerce features
WordPress allows easier expansion.
Many professional blogs and business websites also use WordPress because of its flexibility.
Blogger
Blogger is a free blogging platform owned by Google.
Benefits:
- Free to start
- No hosting cost
- Beginner friendly setup
Limitations:
- Limited customization
- Fewer plugins
- Lower flexibility for long term scaling
Blogger may work if your goal is simply learning blogging basics.
Medium
Medium allows writers to publish articles quickly without managing website setup.
Benefits:
- Very easy publishing process
- Existing audience base
- No technical setup required
Limitations:
- Limited branding control
- Limited design customization
- Less ownership over your platform
Medium works more like publishing on another platform instead of owning your own website.
Wix
Wix uses a drag and drop website builder approach.
Benefits:
- Easy visual editing
- Beginner friendly interface
- Quick setup
Limitations:
- Less flexibility for long term blogging growth
- Limited advanced SEO control compared to WordPress
Which Platform Should You Choose?
If you only want to publish articles casually and learn basic blogging concepts, platforms like Blogger or Medium can work in the beginning.
However, if your goals include:
- Getting traffic from Google
- Building authority
- Affiliate marketing
- Displaying advertisements
- Creating a personal brand
- Long term growth
WordPress usually provides more flexibility.
With WordPress you get:
- Better SEO settings control
- More design freedom
- Thousands of themes and plugins
- Multiple monetization opportunities
- Complete ownership of your website
Since this guide uses WordPress with YouStable Hosting, keeping your domain, hosting, and website management in one place can also make things easier instead of managing multiple services separately.
How to Write SEO Friendly Content for a Telugu Blog
Publishing articles regularly is not enough if your content does not match what readers are actually searching for. A better approach is creating content that answers questions clearly, follows a proper structure, and provides useful information from beginning to end.
Search engines do not rank content simply because an article is long.
They usually analyze multiple factors such as:
- Relevance
- Search intent
- Content quality
- User experience
- Website authority
- Content freshness
If your Telugu blog content solves reader problems better than competing pages, it can create stronger opportunities for long term growth.
Step 1: Find Topics People Already Search For
Many beginners make one mistake:
They write an article first and think about keywords later.
This approach can create problems because good content still needs audience demand.
Instead of choosing random topics, find what people already search for.
You can use:
- Google Autocomplete
- People Also Ask
- Google Trends
- Related Searches
- Search Suggestions
Examples:
Instead of choosing: Mobile
Choose:
- Best Smartphones Under ₹15,000 in Telugu
- Best Camera Phones in Telugu
- Gaming Mobile Buying Guide Telugu
Instead of: Travel
Choose:
- Best Tourist Places in Andhra Pradesh
- Telangana Travel Guide in Telugu
- Budget Travel Tips Telugu
Long tail topics often work better because they target specific user searches.
Step 2: Select Your Main Keyword and Supporting Keywords
Choose one primary keyword and a few supporting keywords before writing.
Example:
Primary Keyword:
How To Start Blogging In Telugu
Supporting Keywords:
- Telugu blogging guide
- Blogging tips Telugu
- Telugu SEO guide
- Blogging for beginners Telugu
- Start Telugu blog
The primary keyword becomes the main focus of your article.
Supporting keywords help search engines understand the topic more clearly.
Do not force keywords unnaturally.
Bad example: Telugu blogging guide is the best Telugu blogging guide because Telugu blogging guide helps Telugu blogging guide users.
This creates poor readability.
Write naturally.
Step 3: Create Your Article Structure Before Writing
Many beginners directly open WordPress and start typing immediately.
Creating a structure first can make writing easier and keep content organized.
Use:
H1: Main title
Example: Best Smartphones Under ₹20,000 In Telugu
H2: Main sections
Examples:
- Best smartphone options
- Camera comparison
- Buying guide
H3: Sub sections
Examples:
- Battery performance
- Gaming performance
- Display quality
Benefits of proper structure:
- Better readability
- Easier navigation
- Better SEO
- Improved user experience
Step 4: Write Content That Solves Reader Questions
Avoid adding unnecessary filler content.
Focus on answering questions directly.
Include:
- Clear explanations
- Real examples
- Screenshots
- Step by step information
- Images
- FAQs
Weak example: Smartphones are useful devices.
Better example: This smartphone includes a 5000mAh battery, a 50MP camera, and performs well for gaming and daily use.
Specific information often creates stronger content.
Step 5: Optimize Important On Page SEO Elements
Before publishing, optimize important SEO elements.
Title
Weak: Technology Tips
Better: 10 Technology Tips For Beginners In Telugu
URL Slug
Good: yourdomain.com/blogging-tips-telugu
Avoid: yourdomain.com/article123-blogging-guide-for-beginners-technology-tips
Shorter and cleaner URLs usually work better.
Meta Description
Example: Learn how to start a Telugu blog with step-by-step instructions covering WordPress setup, SEO, content writing, and monetization strategies.
Good meta descriptions can improve click through rate.
Step 6: Use Internal Links
Internal links connect related articles on your website.
Example: If your article is:
Best Smartphones
You can connect it with:
- Smartphone camera guide
- Mobile comparison article
- Smartphone buying guide
Benefits include:
- Better crawling
- More page views
- Easier navigation
- Better user experience
Step 7: Optimize Images Before Uploading
Large images can reduce website speed.
Before uploading images:
- Compress image size
- Resize large images
- Add image alt text
- Use modern image formats
Recommended formats:
| Format | Best For |
| WebP | Better compression and faster loading |
| JPG | Regular images and photos |
| PNG | Graphics and transparent images |
Example alt text:
Telugu blogging dashboard setup
Step 8: Add Frequently Asked Questions (FAQs)
FAQ sections can answer additional user questions and improve content completeness.
Examples:
- How much does Telugu blogging cost?
- Can I start a Telugu blog using mobile?
- Which platform works best for Telugu blogging?
FAQ sections may also help improve search visibility.
Step 9: Review Your Article Before Publishing
Before clicking publish, check:
- Title added properly
- Headings structured correctly
- Images visible
- Meta title added
- Meta description added
- Internal links added
- Mobile view checked
- Spelling mistakes fixed
Small improvements before publishing can prevent larger issues later.
Step 10: Update Content Regularly
Publishing an article once should not become the final step.
Review and update important pages regularly.
Update:
- Statistics
- Images
- Screenshots
- Links
- Information
- FAQs
Content updates can help keep articles relevant and useful over time.
How To Rank Your Telugu Blog on Google
Publishing articles alone does not automatically improve rankings. Search engines evaluate multiple factors such as content quality, website structure, user experience, relevance, authority, and trust before deciding where your pages appear in search results.
If you want your Telugu blog to grow consistently, follow a structured approach instead of publishing random articles.
Many beginners publish a few posts and expect immediate results. In reality, blog growth usually happens through continuous improvements over time.
Let’s understand the important steps.
Step 1: Understand Search Intent Before Writing
Before creating any article, understand what users actually expect after searching.
Matching user intent correctly can improve:
- Engagement
- User satisfaction
- Click through rate
- Ranking opportunities
Example:
Search:
Best Hosting For Beginners
What users expect:
- Hosting comparison
- Pricing details
- Features
- Recommendations
- Pros and cons
What users usually do not expect:
- Hosting history
- Technical definitions only
Search intent generally falls into these categories:
Informational Intent
Users want information.
Examples:
- How to Start Blogging in Telugu
- What is SEO
- What is WordPress
Commercial Intent
Users compare products or services.
Examples:
- Best hosting for Telugu blogs
- WordPress vs Blogger
- Best AI tools
Transactional Intent
Users want to take action.
Examples:
- Buy WordPress Hosting
- Download SEO Plugin
- Purchase Domain
Writing content according to search intent can improve content relevance.
Step 2: Build Topic Clusters Instead of Random Articles
Publishing unrelated articles may create confusion.
Instead of writing random topics, build multiple connected articles around one main subject.
Example:
Main topic:
Blogging Guide
Supporting articles:
- Blogging mistakes
- SEO tips
- Hosting guide
- Keyword research guide
- WordPress tutorial
- Content writing guide
This approach can help search engines understand your expertise in a specific area.
Benefits include:
- Stronger topical authority
- Better internal linking
- More ranking opportunities
Step 3: Improve Internal Linking
Internal links help search engines understand your website structure while also helping visitors discover related content.
Example:
If your article is:
How To Start Blogging
Connect it with:
- SEO guide
- Hosting guide
- Keyword research tutorial
- Blogging mistakes guide
Benefits:
- Better crawling
- More page views
- Improved navigation
- Better content discovery
Many large websites use strong internal linking strategies because they help distribute authority across pages.
Step 4: Focus on Core Web Vitals
Website speed and user experience have become important ranking factors.
Visitors generally prefer websites that load quickly and provide smooth navigation.
Important metrics include:
| Metric | Meaning | Why It Matters |
| LCP | Largest Contentful Paint | Measures loading speed |
| CLS | Cumulative Layout Shift | Measures visual stability |
| INP | Interaction to Next Paint | Measures responsiveness |
To improve performance:
- Use LiteSpeed Cache
- Compress images
- Use WebP images
- Avoid unnecessary plugins
- Use lightweight themes
- Reduce large scripts
Better speed often creates better user experience.
Step 5: Build Trust Signals
Search engines also evaluate website credibility.
Strong trust signals can create a more reliable experience for users.
Include:
- Author information
- About Us page
- Contact page
- Privacy Policy
- References where needed
- Helpful and original content
For example:
If your article provides health or finance information, adding sources and accurate explanations can improve trust.
Step 6: Keep Content Fresh
Publishing content once should not become the final step.
Information changes over time.
Update:
- Statistics
- Images
- Screenshots
- Links
- FAQs
- Information
Example:
If you publish:
Best Smartphones in 2026
Update it when:
- New devices launch
- Prices change
- Specifications change
Fresh content can remain useful for readers.
Step 7: Earn Natural Backlinks
Backlinks from relevant websites can strengthen website authority.
Focus on creating content people naturally want to reference.
Ways to earn backlinks:
- Helpful guides
- Original research
- Statistics articles
- Comparison articles
- Collaborations
- Detailed tutorials
Avoid buying low quality backlinks because they can create problems later.
Step 8: Monitor Website Performance
Monitoring data regularly helps identify what performs well and what requires improvement.
Track data using Google Search Console:
- Search impressions
- Clicks
- Indexed pages
- Ranking keywords
- Coverage issues
- Top performing pages
For example:
You may discover:
- Which article receives the most traffic
- Which keyword ranks better
- Which pages need updates
Data can help you make better decisions instead of guessing.
Will Your Telugu Blog Rank After Following These Steps?
Following these steps creates a stronger foundation for rankings, but rankings usually do not happen after publishing only a few articles.
Factors such as:
- Content quality
- Competition
- User experience
- Search intent
- Consistency
all work together over time.
Continue publishing useful content, improve old articles regularly, and keep optimizing your website because long term growth often comes from consistent improvements rather than one time work.
7 Ways To Make Money From a Telugu Blog
A Telugu blog can generate income through multiple methods. Most successful bloggers do not depend on a single source because relying on only one earning method can limit growth opportunities.
As your content quality, audience trust, and website traffic increase, additional monetization opportunities may also become available.
One thing is important to understand:
Blogging income usually does not appear immediately. Growth often depends on:
- Content quality
- Audience trust
- Niche demand
- SEO
- Consistency
Let’s understand the most common methods.
1. Google AdSense
Google AdSense is one of the most common ways bloggers monetize websites.
It allows you to display advertisements on your website. When visitors view ads or interact with them, you can earn revenue.
For better approval chances:
- Publish original articles
- Create important pages such as About Us, Contact, and Privacy Policy
- Improve website speed
- Avoid copied content
- Maintain a clean website structure
- Publish enough useful content before applying
For example:
If your Telugu blog receives regular visitors searching for technology or educational content, ads can start generating revenue over time.
Many beginners apply immediately after publishing one or two posts, but publishing useful content first generally creates stronger approval opportunities.
2. Affiliate Marketing
Affiliate marketing means recommending products or services and earning a commission when someone purchases through your referral link.
Popular affiliate categories include:
- Hosting services
- Software tools
- Smartphones
- Gadgets
- Online courses
- AI tools
- Website tools
Example:
If your article is:
Best Hosting For Beginners
You may recommend hosting services through affiliate links.
If a reader purchases through your link, you may receive a commission.
Affiliate marketing often works well because you can earn without creating your own product.
Many blogs generate a large portion of their income through affiliate content.
3. Sponsored Posts
As your website traffic and authority increase, companies may contact you to publish content related to their products or services.
Examples include:
- Product reviews
- Brand promotions
- Sponsored articles
- Service recommendations
- Sponsored mentions
For example:
If your Telugu technology website starts receiving good traffic, software companies or hosting providers may approach you for collaborations.
Sponsored opportunities usually increase after building audience trust.
4. Offer Freelancing Services
Your blog can also become your online portfolio.
Visitors may read your articles and contact you directly for work opportunities.
Examples of services include:
- Content writing
- SEO services
- Website design
- Consultation
- Digital marketing
- Graphic design
For example:
If you regularly publish SEO tutorials, businesses may contact you for SEO work.
Many bloggers receive clients directly through their websites.
5. Sell Digital Products
Digital products can create additional income because they do not require physical delivery.
Examples:
- E-books
- Templates
- Checklists
- PDF guides
- Worksheets
- Website resources
For example:
A blogging website may sell:
- SEO checklists
- Content templates
- Blogging resources
An educational website may sell:
- Study notes
- Practice materials
- Learning resources
Digital products can continue generating income after creation.
6. Create Online Courses
If you have experience in a particular topic, you can convert your knowledge into structured learning content.
Examples:
- Blogging
- SEO
- Photography
- Technology
- Cooking
- Language learning
For example:
If your Telugu blog focuses on blogging tutorials, you can later create:
Complete Telugu Blogging Course For Beginners
Benefits include:
- Higher earning opportunities
- Personal brand growth
- Audience trust
- Additional income sources
7. Combine YouTube With Blogging
Using YouTube together with blogging can create multiple traffic sources instead of depending only on search engines.
Benefits include:
- More visibility
- Stronger personal branding
- Multiple income opportunities
- Audience growth
- Additional traffic sources
Example:
You can publish:
Detailed article:
How To Start Blogging In Telugu
And create:
Short YouTube video:
How To Start A Blog In 5 Minutes
Readers and viewers can move between both platforms, creating a stronger content ecosystem.
A Telugu blog usually does not generate income through one article or within a few weeks.
Most blogs grow gradually as:
- Content increases
- Trust improves
- Traffic grows
- Authority becomes stronger
Using multiple monetization methods together often creates better long term opportunities than depending on only one source.
FAQs
Can I start a Telugu blog without buying hosting in the beginning?
Yes, you can start with free platforms such as Blogger or Medium if your goal is learning the basics of blogging. However, many bloggers later move to self hosted WordPress because it provides better flexibility, customization options, SEO control, and monetization opportunities.
If your goal includes long term growth, affiliate marketing, advertisements, and building your own brand, starting with WordPress can save time later.
What things should I avoid when starting a Telugu blog?
Many beginners make small mistakes that can slow website growth later.
Common mistakes include:
- Choosing too many topics at once
- Copying content from other websites
- Ignoring SEO basics
- Using very long domain names
- Publishing articles without structure
- Installing unnecessary plugins
- Expecting immediate traffic results
Focusing on quality and consistency usually creates better long-term results than trying to do everything quickly.
Can I manage a Telugu blog using only a smartphone?
Yes. Many bloggers create and manage websites directly from mobile devices.
You can:
- Write articles
- Upload images
- Reply to comments
- Install plugins
- Publish posts
- Monitor website performance
The WordPress application can help manage many tasks directly from a smartphone.
A computer may make some activities easier, but it is not required to start blogging.
How much time does a Telugu blog usually take to grow?
There is no fixed timeline because growth depends on multiple factors.
Examples include:
- Content quality
- Niche competition
- SEO optimization
- Content consistency
- User experience
Some websites start receiving traffic within a few months, while others may take longer.
Blogging generally works better when you focus on continuous improvement instead of expecting instant results.
Which Telugu blog niches have good long term potential?
Several categories continue attracting readers because people regularly search for information in them.
Popular options include:
- Technology and gadgets
- Education and career guidance
- Health and fitness
- Food and recipes
- Travel content
- Finance topics
- Blogging and online earning
- AI tools and tutorials
Choose a topic that matches both your interests and long term content ideas.
Do I need perfect Telugu writing skills to start blogging?
No. Your writing does not need to be perfect on the first day.
Readers usually care more about:
- Useful information
- Clear explanations
- Easy to understand language
Writing skills usually improve naturally through practice.
Tools such as:
- Google Input Tools
- Voice typing
- Telugu keyboard apps
can also help make content creation easier.
Conclusion
Building a Telugu blog is not only about creating a website because it also creates an opportunity to share ideas, help readers, and establish a long term online presence. The steps covered in this guide can help create a stronger foundation for beginners who want to start properly.
Progress in blogging usually comes through regular learning, useful content, and understanding what readers actually want. Publishing articles consistently and improving your website over time can create better opportunities than focusing only on quick results or short term traffic.
Every successful blog once started with a first post and a simple idea. Focus on creating value, continue improving your skills, and allow your Telugu blogging journey to grow naturally into something meaningful over time.